Showing posts with label Sewing. Show all posts

Sunday, October 2, 2011

Diaper bag for a friend

One of my very best friends is having a baby girl (after three boys!) and she chose pink, taupe and brown for the nursery with an elephant theme. I was thrilled to find a fabric line in those colors that's available right now so I could make her some special things for baby Hannah's debut, sometime in December. I made her this sturdy diaper bag. I hope it matches her decor (I haven't seen any pictures yet) and that it will get used for play dates or diapers or something.

The dimensions are approximately 18" wide, 15" tall and 5" deep.

The elephants make two spacious front pockets on the front, lined with the pink, white, taupe striped fabric.


On the interior, there are four pockets, two large, two small on one side and a zippered pocket on the opposite side. You can also see the magnetic button closure here - my first time using this closing technique but it was surprisingly simple so I may use it again. This interior pocket is 9" by 10".


The back of the bag has the same elephant print from the front pocket and pink contrasting
 edging. I used the 70 weight Pellon interfacing for this bag so it's very sturdy and stands up all by itself. I also added it to the handles because I prefer substantial handles. I used the tutorial from Sew Like My Mom as a general guideline for the bag.


I made a bunch of matching goodies for little Hannah to fill it up with. My favorite is the minky blanket in Amy Butler's Lotus flower. I've been saving this fabric for something special.


I made it larger than average so it could be used in the stroller or car and as a safe play mat for baby. I used to use these all the time when I needed a safe, soft place to lay my little one for some tummy time, especially at someone else's house. I also used one for William to designate his safe play area, ie no big kid toys allowed on the blanket. Minky is supersoft and the texture appealing. I made a border out of the Amy Butler fabric on one side to give it a more finished look.


 I had more leftover fabric than I intended to have so I also made a diaper clutch bag in coordinating fabrics.


It fits the travel size wipes and two diapers but can be used for all kinds of other purposes. It has a velcro closure and a grosgrain ribbon pull tab.  I like the pink elephants on the inside.


I also made a soft changing pad with one thick layer of fleece and an interior layer of cotton quilt batting. I never liked how thin my changing pads were and even though this one doesn't have a waterproof layer, the whole thing can be tossed in the washing machine.

It folds up in quarters and has a velcro closure.


I also knit a baby cardigan for Hannah in Madeline Tosh superwash. I think it's really cute but I think the size is too large for a new baby. I followed the pattern for a 0-3 month size but I'm pretty sure what I've ended up with is more like a 6-12 month size. The pattern I followed is available for free (thanks Carole!) and is a top-down construction, my favorite.


I think the bag and home made goodies are finally ready to go to the baby shower with me. I hope she likes it. I'm keeping my fingers crossed!

Monday, May 9, 2011

Big boy bedroom

Big boys need big boy beds. So, I built one for my big boy using the plans for a toddler farmhouse bed from Ana White. I built this bed back in October of 2010, but had so much going on then (as I do now!) that it took me a whole month to sand and stain it. Then, in December when my mom came to visit, she put three clear coats on top of the stain to give it a bit of shine and to smooth out the lumber. Because I wasn't ready to move my big boy to his own bedroom, which would be two flights of stairs away from mine, I decided to renovate our walk-in closet to serve as William's first space of his own. It's close to my bed if he needs me but far enough away that he may as well be in his own bedroom.


William likes to snuggle into his big boy bed with the duvet cover I made for him from recycled materials. It's empowering to think that I made everything for him (bed, sheets, pillows, decorations) except for the mattress.


The paint color in his room is a soft neutral tone, called Sand dollar from Sherwin-Williams in Duration, a low-VOC paint that is easily washable.


The pair of round pillows I made following the tutorial from StarDustShoes. They don't match exactly because I'm trying my hardest to not purchase any new fabric and to sew only from my stash to put a serious dent in it. The only fabric I purchased for William's bedroom was the cotton checkered print I used to make his fitted sheet and pillow case (and I only have a 4" x 6" scrap leftover!) and the airplane fabric for his round floor pillows. He loves airplanes and I wanted him to have an airplane-themed space to call his own. I intended the pillows to be a simple place to sit while we read bedtime stories as well as for decoration.


And of course, there are two airplanes on the wall. William seems to be pretty proud of these because he likes to show people his airplanes, which goes something like this, "Dad-ee, Dad-eee, See! See! Airpla-ane! Two, airpla-ane!" with lots of excited gesturing. I've cleared out two of the walls of the shelves that were there, holding clothing but have a little more to go until the space is truly William's. I'm hoping to build a simple drawer with handles to slide beneath his bed to hold some of his favorite bedtime stories. It would be wide and shallow, but perfect for holding an extra blanket and some books. Use of space is priceless in this house, which is much smaller than out last house.


My hope is that William will see this as his own special safe space and will enjoy napping and sleeping at night in his big boy bed very soon...

Thursday, May 5, 2011

Another quilted bag

I hadn't quilted in such a long while that I joined the Spring Quilted Bag Swap through the Quilting Gallery. I had some reservations about the first bag I made (although it did receive positive feedback on flickr) so I decided to make a second one. The tutorial for the quilted bag is free from Geta's Quilting Studio (thanks Geta!).


This time I reinforced the handles with interfacing and instead of using cotton for hidden inner layer, I used canvas, which makes the bag stand up easily on its own. The print is one of my old favorites from Kaffe Fassett and I think it is reminiscent of spring, which is appropriate for a spring themed swap. I quilted it differently, loose circles in a kind of freestyle pattern that I think I like. I am looking forward to writing a letter to my swap partner, who is overseas, and sending this bag along with a handful of other sewing goodies.

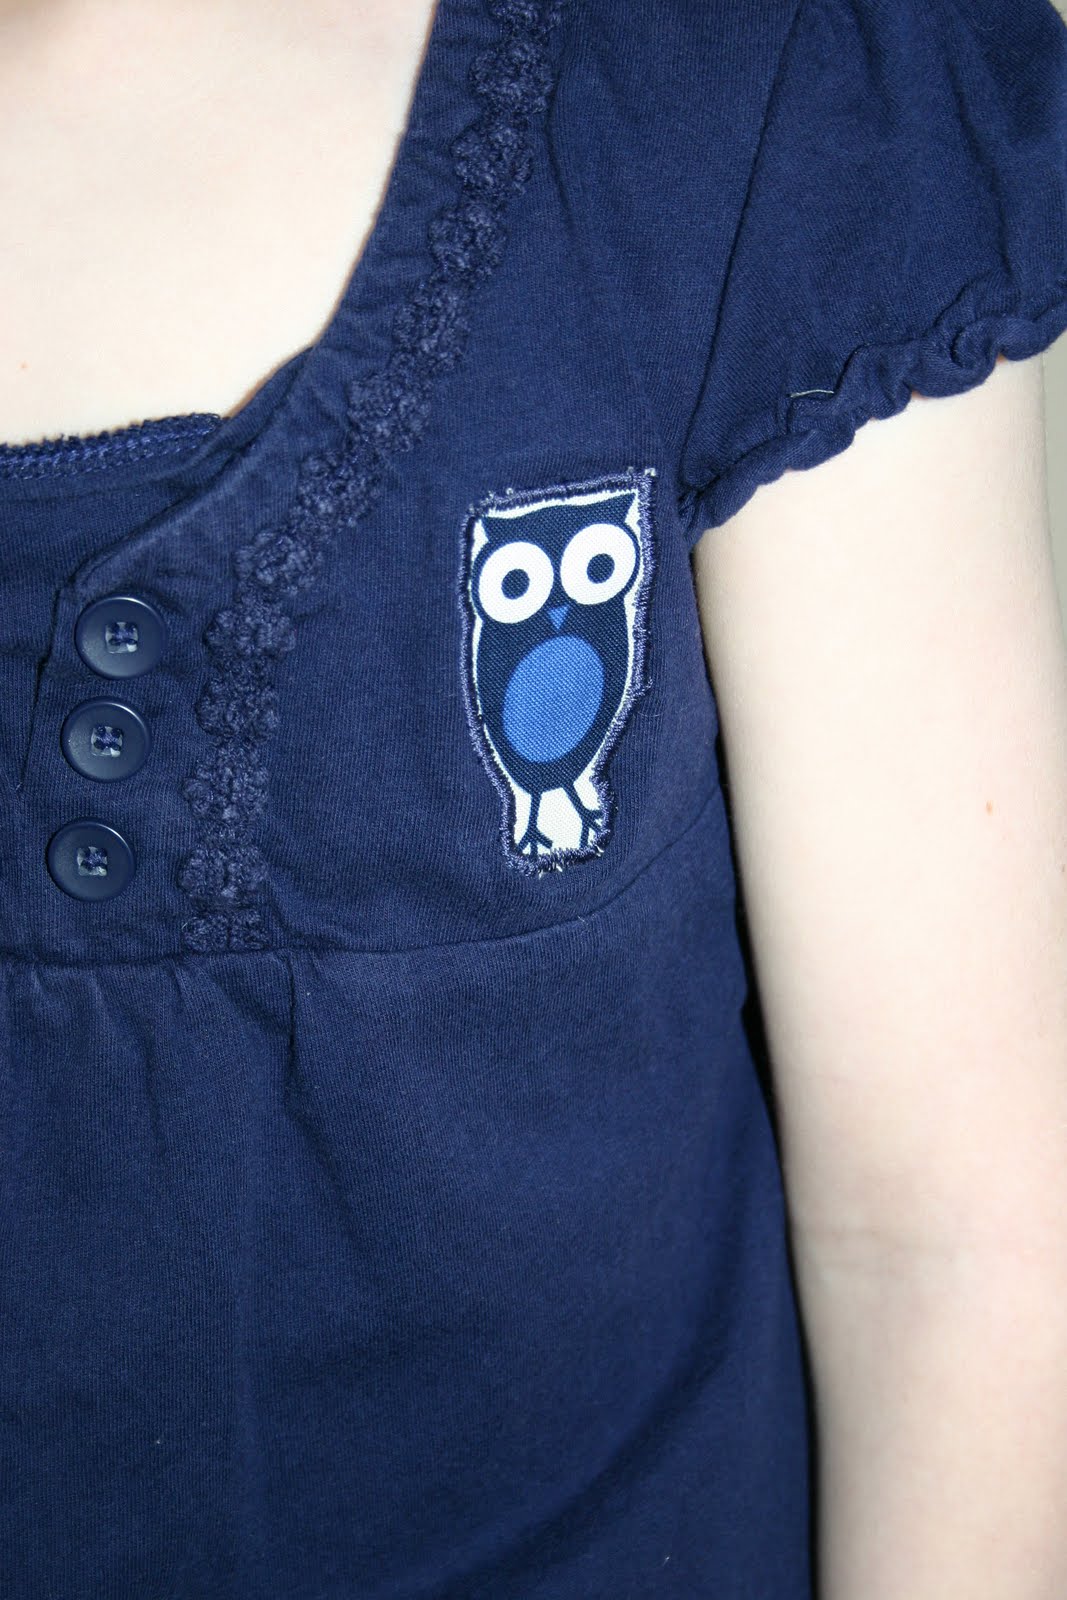
Owl skirt

My daughter is currently in love with Kathryn Lasky's series, the Owls of Ga'Hoole, so owls are frequently on her mind. For Easter I made her an owl skirt. Every year we set out our Easter baskets the night before Easter and after the children go to bed, I tell them I place one or two small mommy-made gifts inside then go to bed so the Easter bunny can fill them up the rest of the way. I like that long after their baskets have been reduced to piles of candy wrappers, the mommy-made things remain.


The fabric is Robert Kaufman's Urban Zoologie, Owls. It's a fun print and in her favorite color of blue. Nearly everywhere she's worn her skirt, she's received compliments on it. There's a spacious side pocket that she's already filled up with pine cones, leaves, and acorns. It's always an adventure sticking my hands in the pockets of her clothes before tossing them into the washing machine; never know what I might find there!


I embroidered an owl on a shirt that matches the skirt, but she has two other coordinating shirts with this print and two coordinating sweaters, which is convenient. It also matches her owl hat. This skirt should fit her for at least two years with the elastic waist band, but if we tire of it, we can always find another use for the fabric and recreate it as something else. For now, we think the owls are super cute!

Friday, April 1, 2011

Reusable produce bags


We try to use our reusable grocery bags when we buy groceries (admittedly, sometimes I forget and leave them in the trunk) but I end up using so many plastic bags in the produce department, it seems that I'm hardly making a dent in the amount of plastic we use. I finally took an old curtain made of 100% polyester and turned it into a set of six produce bags that I can reuse.


The material is translucent so the attendant at checkout can still read labels or count items through the fabric, but it's strong and washable so I can use them over and over. It took me less than an hour to make six and I used ribbon that I had on hand for the closure.


Room enough for at least a dozen pears, or potatoes, apples, etc. but small enough to be brought along without taking up room. Although I made my own in various sizes (longer ones for carrots, wider ones for apples) there are some tutorials I found on the web. Here's one that uses mesh. And some that are made from sheer curtain fabric like mine. You can also purchase them such as this nice set made by LoveForEarth on Etsy.

Monday, February 14, 2011

Heart Potholders

For Valentine's Day this year we had a "crafternoon", where we got together with some friends and made Valentine's. For the moms, who never get enough appreciation for the hard work they do, I made a batch of heart potholders in pinks and reds. Here is the one I made for my kitchen, in my signature blue colors.


I have found that if I use double or triple batting quilted together, my potholders last for a long time and don't result in burnt hands. When we get sick of them, our kids can use them in their play kitchens.


This is a great project to use up leftover fabric scraps as each potholder requires less than a fat quarter of fabric to make. I made a heart template that I liked out of newspaper, and cut it out of my fabric on the fold (the same way you'd cut a heart from folded paper). I liked this heart shape for its wide design. (I didn't want a pointy heart for a potholder.)

Then I layered two or three layers of warm and natural cotton batting behind it, pinned the layers and quilted them together. After quilting, I trimmed the batting neatly to match the edges of my fabric heart, then pinned the backing to it and sewed on my trim. Voilà! A little love and country charm for my kitchen.

Tuesday, February 8, 2011

What's old is new

Two years ago, someone sent Savannah this cute dress that has been well loved.


She's outgrown it but instead of passing it on, we decided to recreate the dress as a skirt so she can enjoy it even longer. I've been meaning to spend more time creating clothes for the kids from things that I have outgrown, stained, or worn through, so why not recreate from her own wardrobe?


By cutting off the straps and the top seam, and adding a 3/4" non-roll elastic waist band, voila, the dress is now a skirt. Something new from something old and all we had to do was sew in a few straight lines. With all the snow we have on the ground right now, it probably seems silly to be sewing a cotton skirt like this but soon we'll take our winter escape vacation to Florida where she can prance around the sandy beaches with her new skirt.


I can hardly wait!

Saturday, February 5, 2011

Mending

To mend (verb used with object): to make (something broken, worn, torn, or otherwise damaged) whole, sound, or usable by repairing

Even though I'm often sewing new things out of new fabric, which can be fun and exciting, I think it's important to spend time mending the things we already own. It may not feel glamorous to have a pile of clothing in want of a button or needing a seam restitched or a pocket hole repaired, but it saves so much. It saves the item of clothing from the trash heap, it saves money, not having to replace something that has use left, and it saves us the time we spend shopping for the right thing to replace what we lose. I also find it humbling to repair the old instead of running out to grab the next new thing off the shelf without much thought to the life cycle of these items and how their life cycles affect future generations.

Today I mended clothing, most of them needing small repairs, one by hand, four on my machine. It took little time really. One was my husband's favorite pair of sweatpants from college (they've seen repairs in prior years!). Another was a good work shirt that cost a surprising amount of money. Then there were the leather gloves, sweater, buttons and a patch for my daughter's clothes. Each one a simple fix that I was glad to do, even though I'd put it off for a few weeks.

I hope you use your sewing talents for mending too when the occasion presents. What a worthy use of time to take something broken and make it whole and usable again.

Tuesday, January 25, 2011

Dresses (and shorts) for Africa

In my last post, I invited you to join me in sewing for this great charity, Little Dresses for Africa. When I read through the charity's website, I found they need shorts for boys just as much as dresses for girls. At my local library, where a sewing group is collecting the dresses to be shipped at the end of this month, I counted 21 dresses, but no shorts. So I had to get to work making a bit of both, shorts with fabrics that I had a small amount of, and dresses when I had a larger quantity needing a purpose.

Here are some of the works I'll be contributing this year.


I went through my fabric stash, which needs some TLC, and pulled out all the fabrics I hadn't used in over a year and didn't think I would find a good use for. This was about a dozen fabrics! I quickly cut out shorts in various sizes, using a template I made up. I surged the crotch and the inner seams between the legs, where the fabric is the most likely to come undone from use and play, then used straight seams on the rest.

Here's a size medium (ages 5-7) being modeled by my daughter. I like them so much on her I think I'll use some more of my fabrics in February to make her some quick cotton shorts for the summer or a much needed trip to Florida (it was -10F this morning!). The shorts have either 3/4" or 1/2" non-roll elastic in the waist bands. Even though they say they're non-roll, my experience is that will roll, a constant annoyance  for the wearer (or her mother!). I sew over the elastic in the front and the back of the shorts where there is a natural seam, stitching in the ditch, as the technique is called to prevent this.

This was my first "pillowcase dress" and I used all the fabric I had left in this print to make it. It's a size small (age 2-4). I made a pocket on the front from the extra fabric from the arm shaping. In case you haven't seen Garnett Hill's catalog this year, these are "in" at $78 each. Yikes!

Here's the same dress on my little model who would have preferred to spend the time writing on my walls with marker!
At home, these sew up quickly in half an hour - including using my serger for some of the seams, so no way could I pay $78 for one, even lining it wouldn't take that much more time.

My design wall filled up.

I love this pair! I could never think of how to use this fabric in one of my quilts, but I think this is perfect.

Some have pockets.

Katie jump rope fabric - loved it but had too much of it on hand.

Fourth of July shorts in size small and mellow yellow in medium.

More Katie Jump fabric to use up. Hope someone appreciates the bright colors!

Kaffe Fasset fabric.
This dress in size medium is one of my favorites. I used non-roll elastic to make the ruffle at the neckline and double-fold bias tape for the top of the pleated pocket and straps. This one is really cute!


The last dress! All in all three dresses, and seven pairs of shorts, a lighter fabric stash for me and now I really know how to sew shorts. I wish I could see them on their recipients but I'll just have to imagine these bright prints given life by the beautiful brown bodies who will receive them. I hope the children enjoy them.

Monday, January 3, 2011

Little Dresses for Africa

So last year I made some lofty quilting resolutions. Lofty because I had no idea how much time and energy one little toddler boy could consume. I hardly had the chance to work on any of them but now I know! If I can complete all of my work this month, there's a charity that I really want to sew for. The dresses can be made at any time but my local sewing group is collecting them by the end of the month to deliver in person and a little deadline to heat the underside of your pants never hurt.

Here's one of the cute dresses from the Little Dresses for Africa website of a girl who received a re-purposed pillow case dress and the girl who made it for her.

So, I'm spreading the word for anyone else who may have extra fabric lying around that needs a new home - say on a little girl or boy in Africa, who would be much obliged to have something new and clean and colorful to wear. There is a pattern supplied for your convenience but any dress pattern is welcomed (or shorts for boys!) because this project is really about love, not sewing perfection. I hope to minimize some of my fabric stash with a few of these, and if I don't meet the end of January deadline, I can always make them year round to donate. I hope you make one too!

Friday, December 17, 2010

Sara's Workshop

I don't know how the elves at the North Pole are doing, but my workshop is in full swing! Thanks to Ana White from Knock-off Wood, I've created this for the special little girl in my life (who will be receiving a special doll this Christmas from her Nana).

Savannah's doll bed for her special Christmas gift, Julie (an American Girl doll).

I modified the plans a bit: I made the bed longer to accommodate an American Girl doll and instead of using 5 1x3s for the head and foot boards, I used 6 1x2s, so mine is more narrow like a regular full size bed, only doll sized. We worked on the quilt together and I sewed the pillow and pillowcase while my daughter's sweet little head was brimming with sugar plums. The quilt is her design and she approved the prototype. The fabric is leftover from a log cabin style quilt that I made for her. I couldn't resist sewing a mini European-style pillow sham for the bed.


The bed is a farmhouse style bed, the second one I've built. I painted it this afternoon in Divine White, a Sherwin-Williams Duration paint (ie, low-VOC). I wish I had a picture for you of her doll in the bed for size. For now, this is the best I can do. Since Julie has a rabbit in her stories, she will have a rabbit doll of her own to snuggle with in her new bed.


I can't wait to give this to my daughter on Christmas morning. She's going to be the happiest little girl in the house! Plus, I built the entire bed out of scrap lumber that I had lying around in my scrap bin in the garage, painted it with leftover paint, and used fabric scraps from my bin, so it cost me close to zero.


"Real" pillow and pillowcase. My daughter is in charge of all stuffing so she stuffed the pillow herself with her nimble little fingers.
What's going on in your workshop?

Wednesday, December 15, 2010

Winter jumper

Just because it's 18 degrees outside, doesn't mean that your daughter wants to stop wearing dresses. Using the tutorial for the Bubblegum Jumper at From An Igloo (if you haven't scooted over to this blog for great tutorials and ideas, click on it now!), I decided to make my daughter a winter dress.  I purchased fabric from Fabric.com where I was already buying fabric to make something for William's Christmas present, to be revealed soon enough. I used a rich purple corduroy fabric.

I hope you can see the rich colors and textures of this fabric.
Because I had to sew the dress in time for her piano recital, I didn't use the button hole design from the tutorial. Rather, I sewed the back straight up to the chest piece, which I lengthened to 4.5 inches, and used hook and loop closures, which are not permanent, unlike button holes, and can be adjusted as she grows. The dress is also double-hemmed, meaning that when she grows another few inches, I can let out the current hemline to reveal another hemline beneath it that is 2.5 inches longer.


The dress isn't perfect, I have to re-position one of the straps, but she looks really cute in it and it has great texture and warmth. She can wear it with a turtle neck and it will fit her again next year. Overall, a very simple dress pattern for any little girl needing a dress in a jiffy and adaptable to many different types of fabric. I might even make a doll-size one with the leftover fabric for Savannah's favorite new doll for Christmas.

Sunday, June 20, 2010

Car seat strap wrap

My little guy likes to fall asleep in the car from time to time and I always cringe when I see his soft little baby neck marred with the red line of his car seat strap. That can't be comfy! Using the quilt as you go method, I made a velcro wrap to cushion his head and neck from the straps of his car seat.


It's all made from bits of fabric scraps from Denyse Schmidt's Katie Jump Rope and some from Anna Maria Horner.  There are two layers of cotton batting quilted in the middle to make it cushy.


So far, so good, the little guy wakes up happy and mark-free from his car naps and appears more comfortable when napping now.